Note: To help prevent issues with your V400m, we recommend that you do the following:
- Charge your V400m when you aren’t using it.
- Keep your V400m within range of the router.
- Connect your V400m to secure networks.
To set up your V400m, complete the following steps:
- Load the printer paper
- Turn on your V400m
- Connect your V400m to your network
- Configure your POS
- Test a transaction
Load the printer paper
- Open the paper compartment on your device by pulling the latch up, and then pull the compartment door down.
- Insert the paper roll with the edge of the paper at the top of the roll.
- Unroll the paper until it is over the serrated edge of your device, and then close the compartment door.
Turn on your V400m
- Insert the 5V power adapter into the power port on your V400m.
- Plug the power adapter into a power socket. Your V400m should turn on.
- If your V400m does not turn on, hold Enter for at least two seconds.
Note: Before you continue to set up your V400m, we recommend that you charge it for at least two hours.
Connect your V400m to your network
You can connect your e285 to your network using one of the following connection types:
Wi-Fi
Find your network
Important: If you’re not using our Meet in the Cloud solution, connect your V400m to the same network as your POS.
- Use the keypad to press 1, 5, and 9 at the same time.
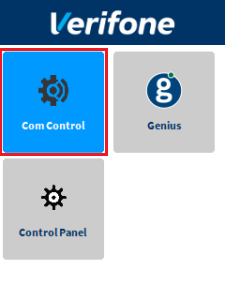
- Tap Com Control.
- Tap WiFi.
- Tap Configuration, and then use the keypad to type the password. The default password is 200331.
- Tap OK.
- Tap WiFi Scan.
Connect to your network
- From the list of available networks, tap the network you want to connect to.
- Tap Add.
- Select the type of authentication that your network uses. If you don’t know the type of authentication your network uses, contact your network administrator.
- Enter your network details. The details you need to enter depend on whether you chose pre-shared key (PSK) authentication or extensible authentication protocol (EAP) authentication.
- For PSK authentication, in the Pre-Shared-Key (PSK) field, enter the authentication password.
- For EAP authentication, enter the following:
- Tap OK.
- Tap Save, and then tap OK.
- Tap Yes.
- To return to the WiFi menu, tap OK.
Apply your settings and return to the home screen
- Tap
 twice.
- Tap Exit, and then tap Yes.
- Tap the Genius icon.
Bluetooth
Pair your V400m with your POS to share your POS’ network connection with your V400m.
Important: Make sure that your POS supports Bluetooth network sharing. This functionality could be called “Tethering” or “’Hotspot” depending on whether your POS runs on Android, Windows, or iOS.
- Turn on or restart your e285 to begin the three-minute pairing window.
- Wait until you see the home screen.
- On your POS, do a Bluetooth scan.
- From the list of available Bluetooth devices, select your Verifone e285 device.
- Confirm any pairing prompts that appear on your e285 or POS.
Check your connection
Wi-Fi
- Use the keypad to press 1, 5, and 9 at the same time.
- Tap Com Control.
- Tap Status.
- Confirm that the Status field shows “Up.” If the Status field shows “Down,” contact our Semi-Integrated Support Team.
- Make a note of the IP address as you will need it to configure your POS.
Bluetooth
- Use the keypad to press 1, 5, and 9 at the same time.
- Tap Com Control.
- Tap More.
- Tap Status.
- Tap IP Addresses.
- Tap BT LAN.
- Confirm that the Status field shows “Up.” If the Status field shows “Down,” contact our Semi-Integrated Support Team.
- Make a note of the IP address as you will need it to configure your POS.
To configure your POS, you need the following information:
- Your Merchantware credentials, including your:
- Merchantware name
- Site ID
- Authentication key
- The IP address of your V400m.
Test a transaction
Run a test transaction on your POS to make sure you correctly configured it with your V400m.
- If the test transaction successfully transfers to your V400m, cancel the test transaction and start running live sales.
- If the test transaction doesn’t successfully transfer, contact our Support Team.
Let us know if this answered your question. If not, please let us know why!
Tags: configuration, wifi, configure pos, v400m, static ip address, set up, run transaction