To set up your Semi-Integrated P400, complete the following steps:
Step 1: Attach the utility cable
1. Turn your Semi-Integrated P400 upside down and place it on a flat, stable surface.
2. Remove the rear cover by sliding it up and lifting it off.

3. Attach the utility cable to your device. Push the connector straight down so that you don’t bend the pins.

4. Slide the rear cover back onto your device until it clicks.

Step 2: Attach the power adapter
Important: Do not attach a Power over Ethernet (POE) cable to your P400. Attaching a POE cable to your P400 can damage the connection ports.
1. Insert the 12V DC power adapter into the power port on the utility cable.
2. Plug the 12V DC power adapter into a power socket. Your device will turn on.

Step 3: Connect your device to your network
You can connect your P400 to your network using the following connection types:
Ethernet
1. Insert one end of the Ethernet cable into an available port on your router or switch.

2. Insert the other end of the Ethernet cable into the Ether port on the utility cable.

Wi-Fi
Important: If you are not using our Meet in the Cloud solution, connect your P400 to the same network as your POS.
Find your network
1. Use the keypad to press 1, 5, and 9 at the same time.
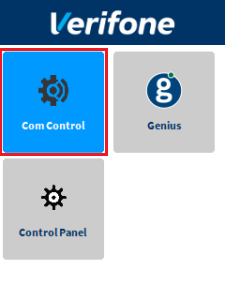
2. Tap Com Control.
3. Tap WiFi.
4. Tap Configuration, and then use the keypad to enter the password. The default password is 200331.
5. Tap OK.
6. Tap WiFi Scan.
Connect to your network
1. From the list of networks, tap the network you want to connect to.
2. Tap Add.
3. Select the type of authentication that your network uses. If you don’t know the type of authentication that your network uses, contact your network administrator.
4. Enter your network details. The details you need to enter depend on whether you chose pre-shared key (PSK) authentication or extensible authentication protocol (EAP) authentication.
a. For PSK authentication, in the Pre-Shared-Key (PSK) field, enter the authentication password.
b. For EAP authentication, enter the following:
i. Identity
ii. Password
5. Tap OK.
6. Tap Save, and then tap OK.
7. Tap Yes.
8. Tap OK.
Apply your settings and return to the home screen
1. Tap  .
.
2. Tap Exit, and then tap Yes.
3. Tap Genius.
USB
Connect your P400 with your POS device using a standard USB cable to share your POS’ network connection with your P400.
Note: A standard USB-A to USB-C cable is not included with your P400 device.
1. From the home screen, use the keypad to press 1, 5, and 9 at the same time.
2. Use the keypad to press 1, 5, and 9 at the same time again, and then tap supervisor.
3. Use the keypad to enter the supervisor password. The default supervisor password is 1166832.
4. Tap OK.
5. Tap Administration > Communication > USB Gadget settings.
6. Set “USB Gadget” to Ethernet.
7. Set “USB Network Protocol” to RNDIS.
8. Tap back, and then tap OK.
9. Tap back twice.
10. Tap Exit, and then tap Reboot.
11. Connect your P400 to your POS device using a standard USB cable.
a. Insert the USB-A end of the USB cable into the USB port on the P400’s utility cable.
b. Insert the USB-C end of the USB cable into your POS device.
12. Enable USB tethering on your POS device.
13. From the home screen of your P400, use the keypad to press 1, 5, and 9 at the same time.
14. Tap Com Control.
15. Tap More.
16. Tap Configuration, and then use the keypad to enter the password. The default password is 200331.
17. Tap Network Interface.
18. Tap USB.
19. Tap ETH Host Settings, and then tap IPv4.
20. Tap DHCP, and then tap Yes.
Apply your settings and return to the home screen
1. Tap .
2. Tap Save, and then tap OK.
3. Tap Yes and then tap OK.
4. Tap four times.
5. Tap Exit, and then tap Yes.
6. Tap the Genius Icon.
Step 4: Check your connection
Ethernet/Wi-Fi/USB
1. Use the keypad to press 1, 5, and 9 at the same time.
2. Tap Com Control.
3. Tap LAN or WiFi.
4. Tap Status.
5. Confirm that the Status field shows “Up.”
– If the Status field shows “Down,” contact our Support Team.
Step 5: Configure your POS
To configure your POS, you need the following:
Let us know if this answered your question. If not, please let us know why!
Tags: run transaction, attach cable, configuration, p400, configure pos, dynamic ip address, static ip address, set up