To set up your Genius M400, complete the following steps:
-
- Attach the utility cable
- Attach the power adapter
- Connect your device to your network
- Check your connection
- Configure your POS
Attach the utility cable
- Turn your Genius M400 upside down and place it on a flat, stable surface.
- Remove the rear cover by sliding it up and lifting it off.
- Attach the utility cable to your Genius M400 by inserting the USB-C connector into the USB-C port.
- Insert the USB-C cable into the back of your device. Make sure that the cable is in the groove above the USB-C port.
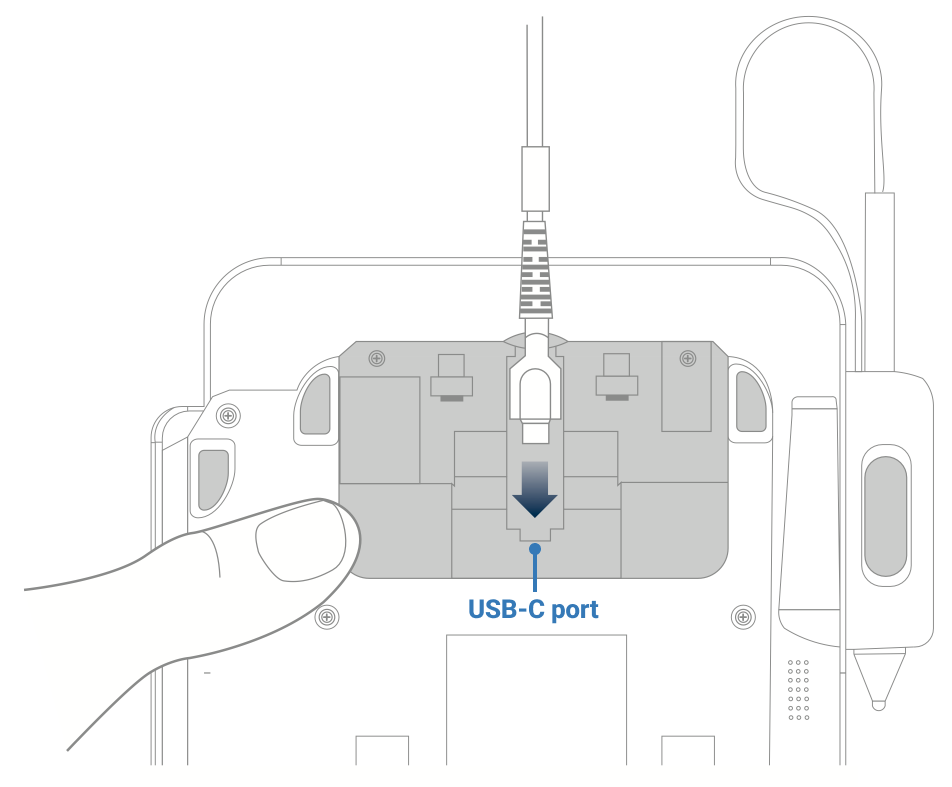
- Slide the rear cover onto your device until it clicks.
Attach the power adapter
-
- Insert the 12V DC power adapter into the 12V DC port on the utility cable.
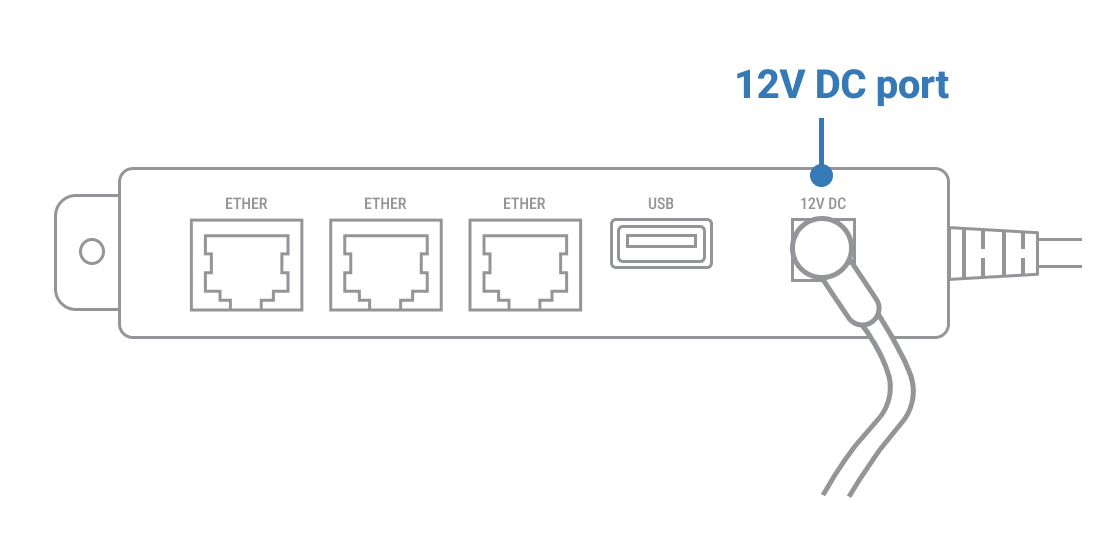
- Plug the 12V DC power adapter into a power supply. Your device will turn on.
Connect your device to your network
You can connect your M400 to your network using the following connection types:
-
-
Ethernet
-
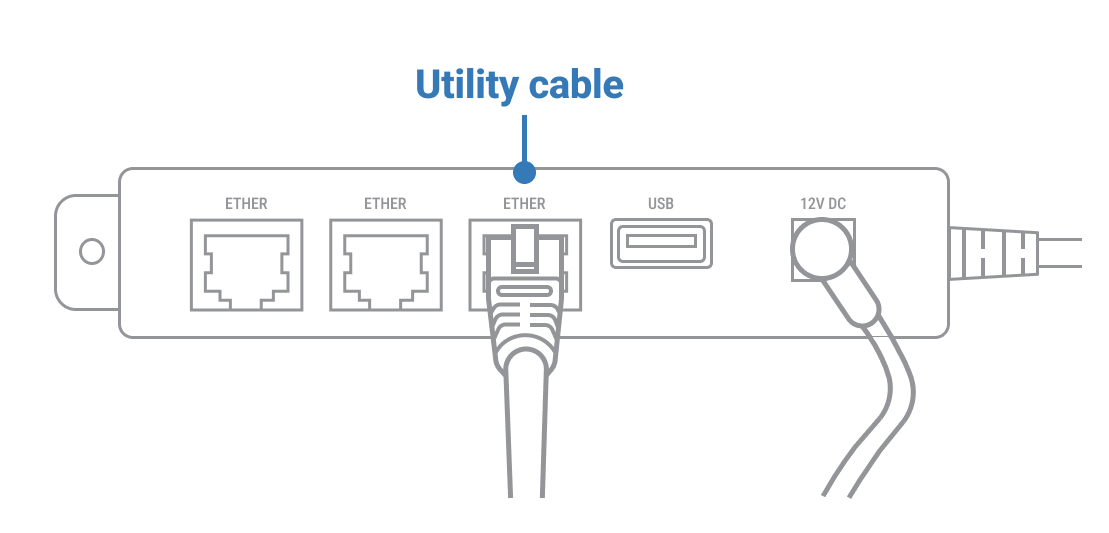
- Insert one end of the Ethernet cable into an available port on your router or switch.
- Insert the other end of the Ethernet cable into an ETHER port on the utility cable.
WiFi
Note: If your Genius V400m prompts you to “Power interface?”, tap Yes.
Find your network
Important: If you aren’t using our Meet in the Cloud solution, connect your M400 to the same network as your POS.
- Use the keypad to press 1, 5, and 9 at the same time.
- Tap Com Control.
- Tap WiFi.
- Tap Configuration, and then use the keypad to enter the password. The default password is 200331.
- Tap OK.
- Tap WiFi Scan.
Connect to your network
- From the list of networks, tap the network you want to connect to.
- Tap Add.
- Select the type of authentication that your network uses. If you don’t know the type of authentication your network uses, contact your network administrator.
- Use the on-screen keyboard to enter your network details. The details you need to enter depend on if you chose pre-shared key (PSK) authentication or extensible authentication protocol (EAP) authentication.
a. For PSK authentication, in the Pre-Shared-Key (PSK) field, enter the authentication password.
b. For EAP authentication, enter the following:
i. Identity
ii. Password
- Tap OK.
- Tap Save, and then tap OK.
- Tap Yes.
- Tap OK.
Apply your settings and return to the home screen
- Tap
 .
.
- Tap Exit, and then tap Yes.
- Tap Genius.
Check your connection
- Use the keypad to press 1, 5, and 9 at the same time.
- Tap Com Control.
- Tap LAN or WiFi.
- Tap Status.
- Confirm that the Status field shows “Up.”
– If the Status field shows “Down,” contact our Genius Support Team.
To configure your POS, you need the following:
– Merchantware name
– Site ID
– Key
Let us know if this answered your question. If not, please let us know why!
Tags: ready to use, attach cable, set up genius, set up pos, m400, power adapter