Step 1: From the Data Access Management tab, click “Create New Data Access Group”.

Step 2: Enter the group name and description. Click “Next Step” at the bottom right of the page.
Note: The group name cannot contain spaces or digits. For example, “groupnameone” is acceptable, and will let you continue. Entering “group name 1” triggers a warning that you have entered an invalid description.
Step 3: Select data access either by Hierarchy or MID.

By Hierarchy
- Select an option from each of the dropdowns: Bank, Group, Assoc.

- Choose an action from the dropdown.
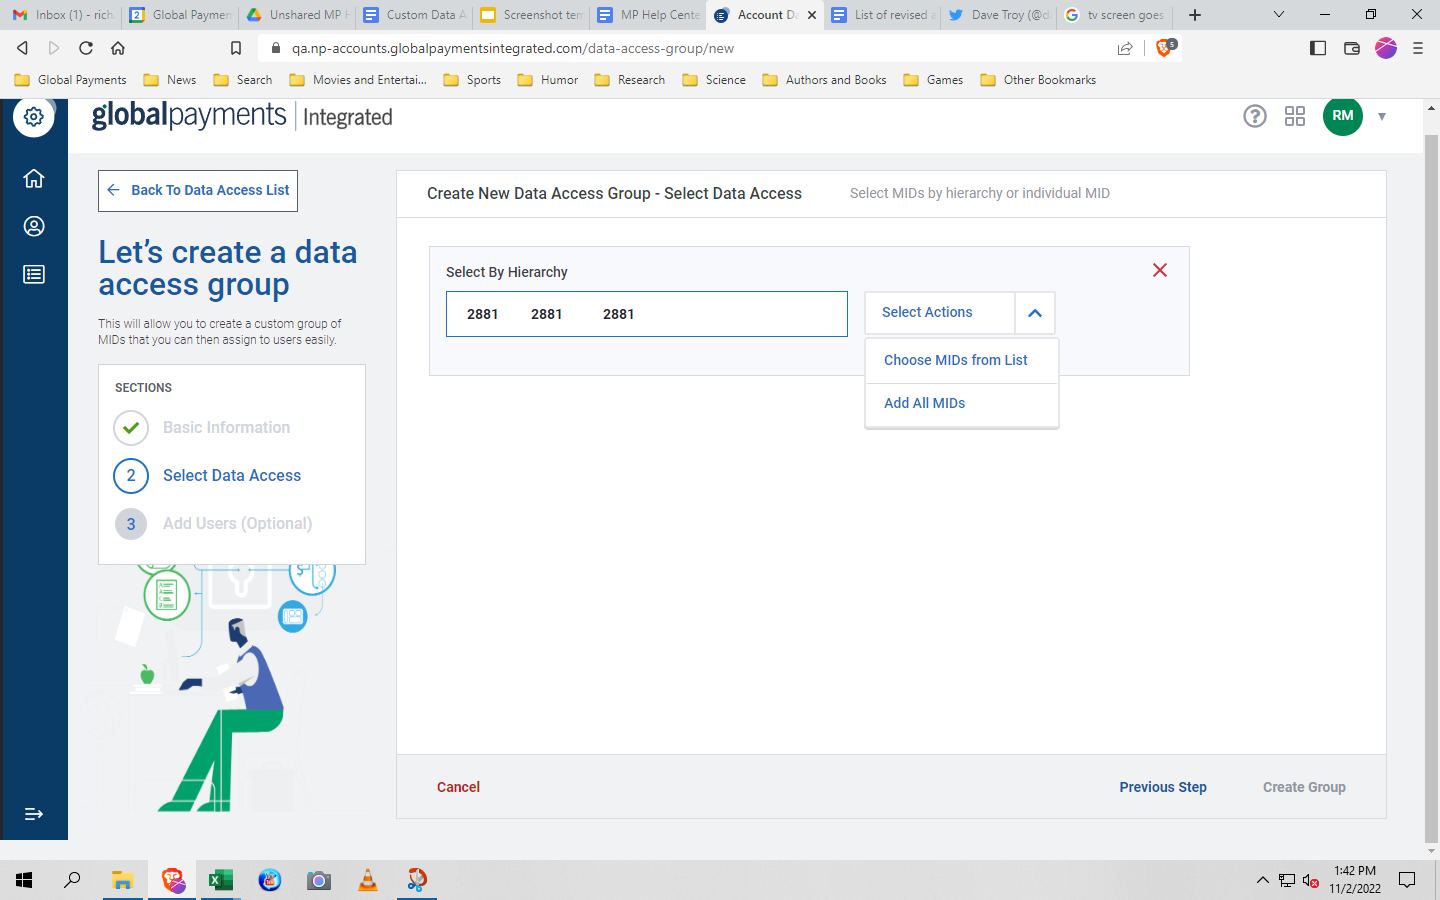
- Click “Create Group”.
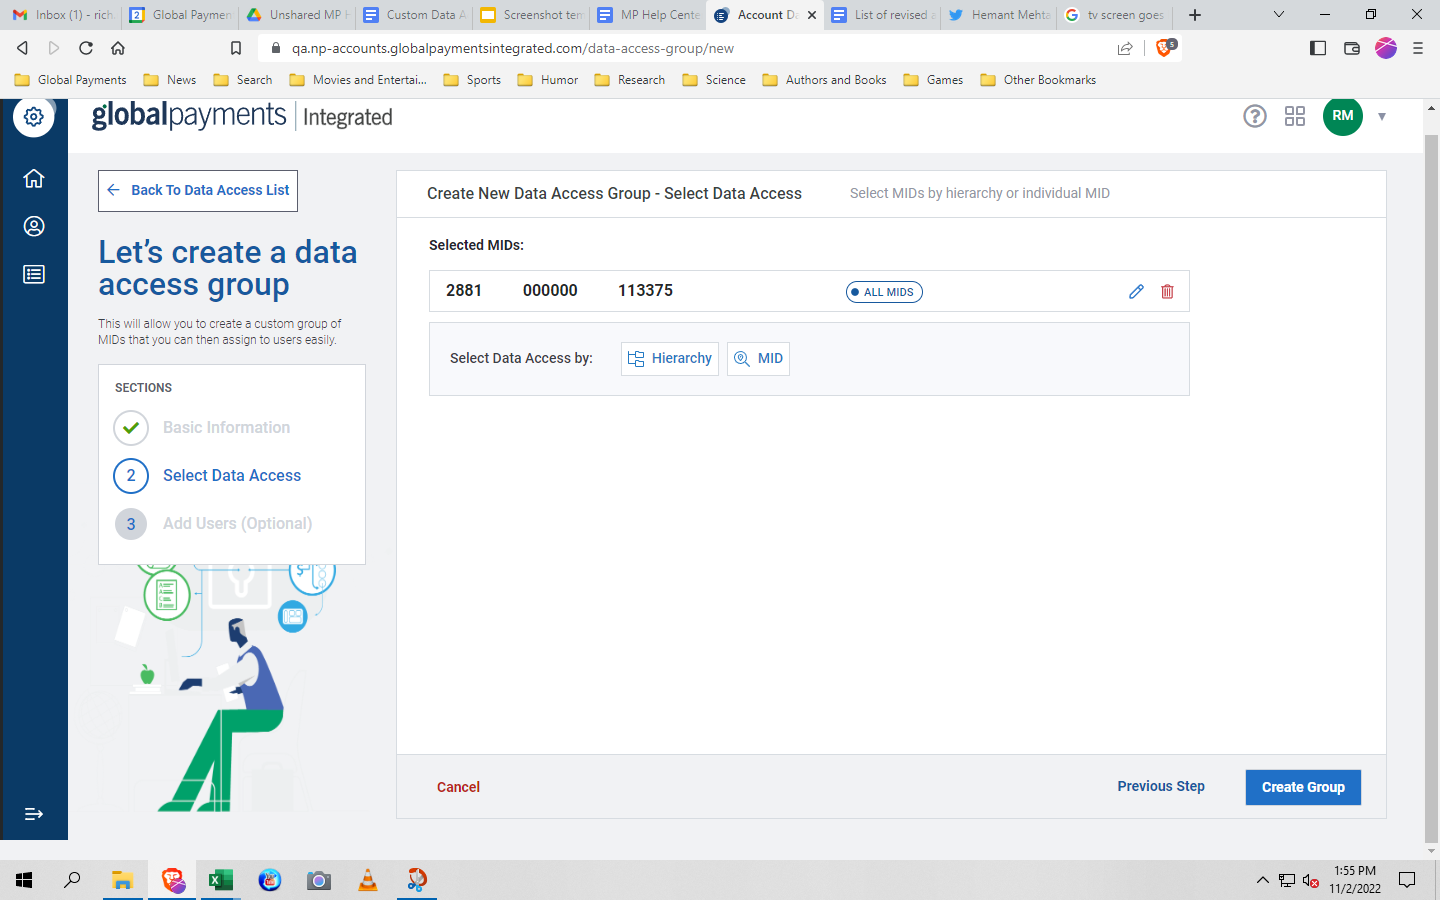
Once you’ve created the group, you can add users by clicking the “Add Users to Group” button.

By MID
- Enter at least 4 digits of the MID.
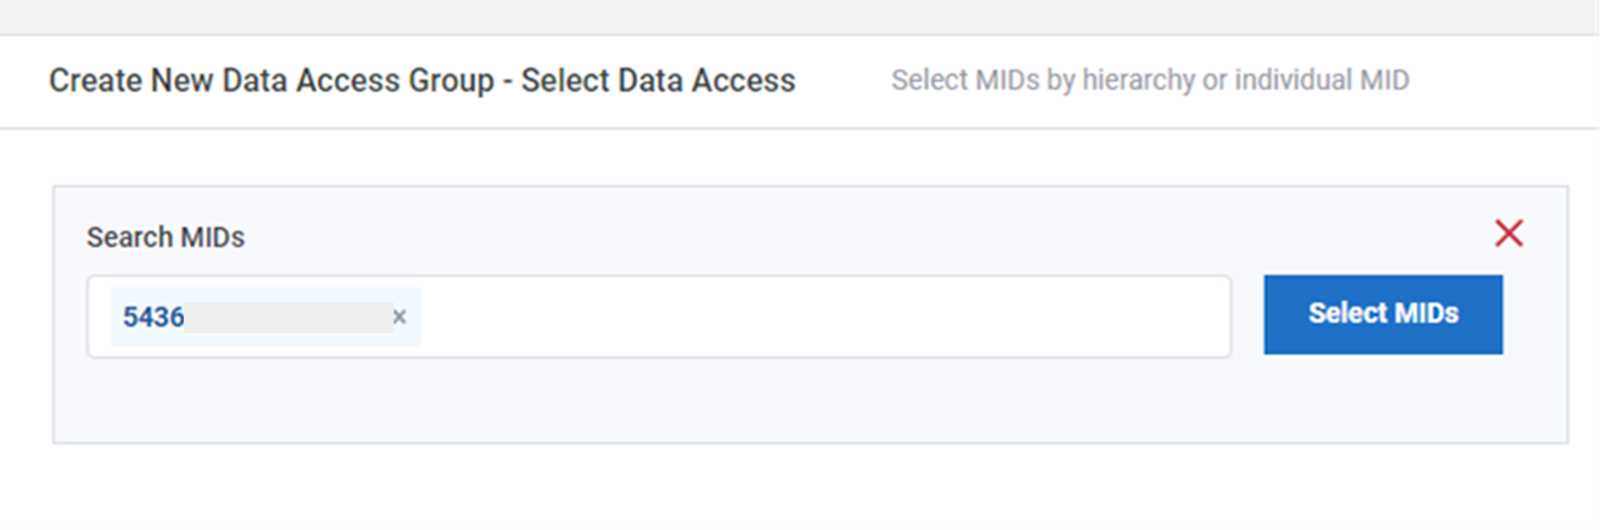
- Click “Create Group”.
Once you’ve created the group, you can add users by clicking the “Add Users to Group” button.
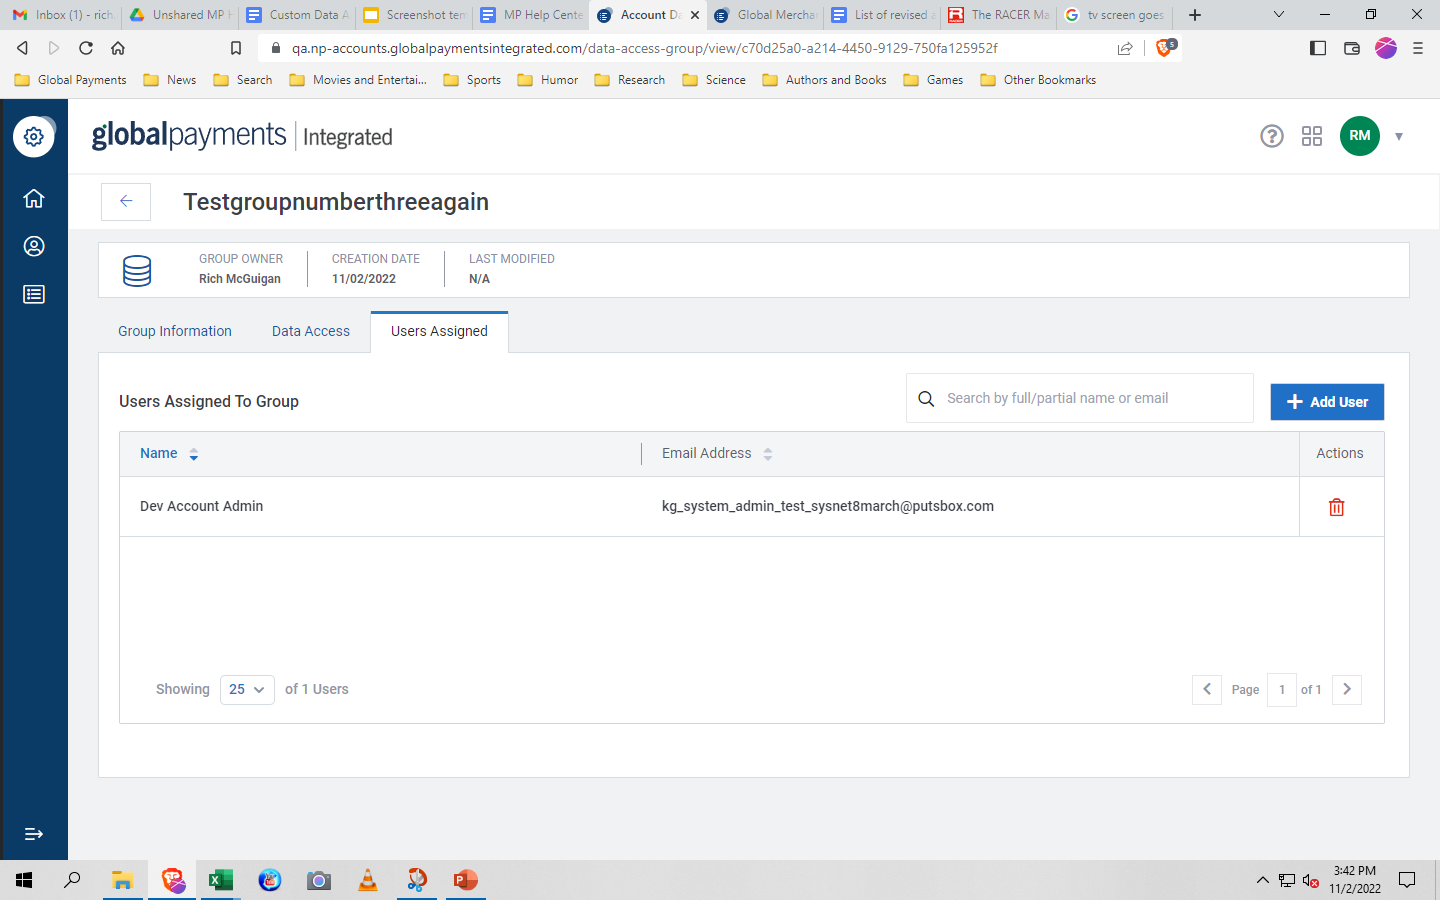
Deleting users from the group
Note: A confirmation message will appear asking if you want to delete the user. Either click “Yes, Delete” or “Cancel”.
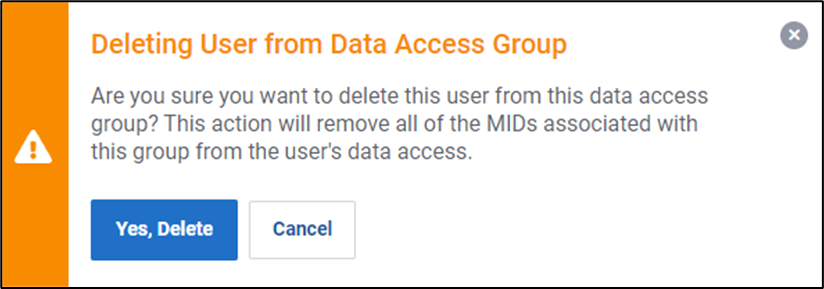
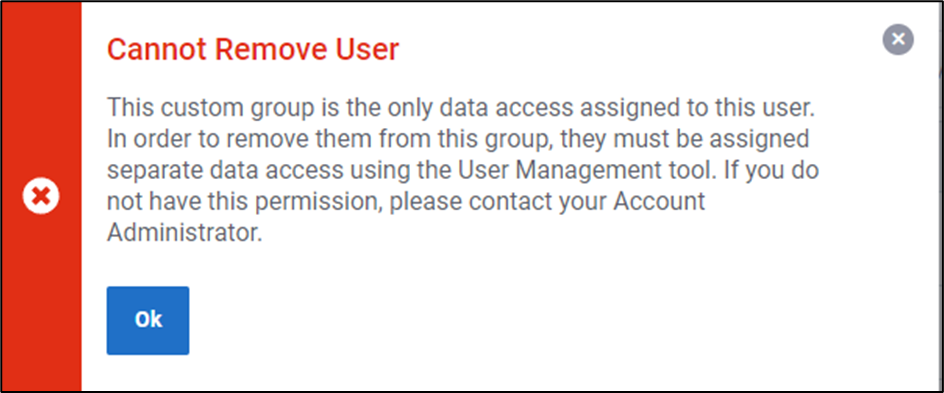
However, if you try to delete a user that is only assigned to the group, a warning will pop up, and you’ll need to reassign them prior to deleting.
- Click the trash can next to the user’s name. It may take a few minutes for the user to be deleted from the group.
Deleting a group
Note: To avoid removing a user’s data access by accident, delete all users in a group before deleting the group.
From the Data Access Management screen, click the button under “Actions”. Click “Delete Group”.
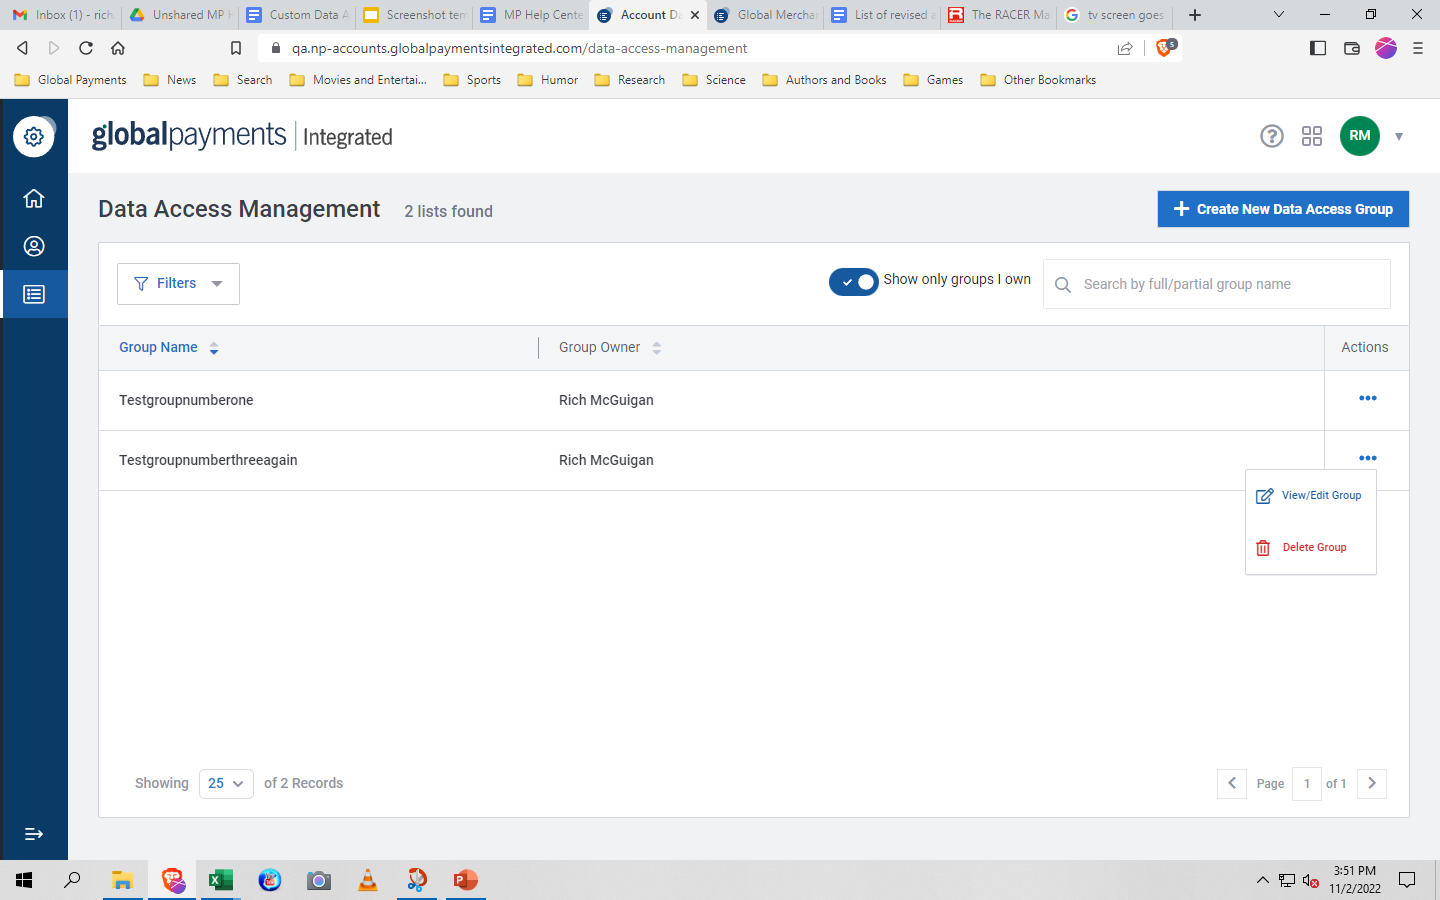
A confirmation message will appear asking you if you’re sure you want to delete the group. Click “Yes, Delete”.