Important: You must add a customer for recurring billing and add a payment card to their profile before you can create a recurring billing contract.
Important: If applying a surcharge to a transaction, please note that it is available only for U.S. issued credit cards when processing a sale or an authorization transaction.
To apply a surcharge to a recurring billing contract, your merchant account must be enabled for card not present surcharging. When creating a new recurring billing contract, surcharging is selected as default. If updating an existing recurring billing contract, you must select to apply the surcharge to the contract.
When creating a recurring billing contract, you can define the following:
Length of the contract by entering a starting date and an ending date. To create a contract that continues until you deactivate or delete it, or until the customer’s card expires, type a starting date but leave the ending date blank.
Billing schedule. Using the billing schedule, you can bill your customers:
- Daily: Once a day
- Weekly: Once a week
- Biweekly: Once every two weeks
- Monthly: Once a month
- Semimonthly: Twice a month
- Annually: Once a year
- Semiannually: Twice a year
- Quarterly: Every three months
Number of retry attempts the Payments Portal makes to capture the payment. You can set the Payments Portal to make one to ten retry attempts, after which it suspends the recurring billing contract.
Complete the following steps:
1. On the toolbar, click Recurring Billing.
2. Beside the customer’s record, click Add a New Contract
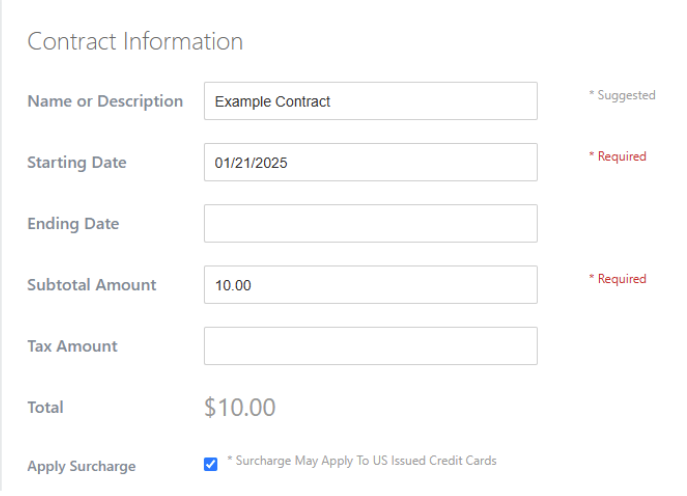
3. Enter the Contract Information:
- Name or Description
- Click Starting Date, then select the date manually or type the date in
mm/dd/yyyy format.
- Subtotal Amount
- Tax Amount
- Apply Surcharge: If surcharging is enabled for your merchant account, the Apply Surcharge option is selected by default.
4. Enter the Billing Settings:

- Use the Billing Schedule drop-down menu to select the billing interval.
- Use the Retry Attempts drop-down menu to select the number of retry attempts the Payments Portal makes before it suspends the contract.
5. Select the Payment Method.
6. Select the Email Notifications you prefer:
- To receive a notification when a payment is approved, select the Receive an email notification when a payment is approved check box.
- To receive a notification when a payment is declined, select the Receive an email notification when a payment is declined check box.
7. Click Save Contract.
Let us know if this answered your question. If not, please let us know why!
Tags: subscription, customer profile, billing schedule, create contract, payments portal, recurring billing, contract